Shapes, Properties, Parenting + Precomps
Everything in After Effects is a layer. We start with the simplest ones: shapes.
This section enables you to
- Draw simple shapes with a centred anchor point
- Change the transform properties of a layer
- Link layers with parenting
- Bundle layers into a precomp
Shape Layers
Before you draw, change one setting so the anchor point lands in the centre of every new shape.
-
01
Center the anchor point
Turn on Center Anchor Point in New Shape Layers. Older Mac versions say Preferences instead of Settings, on Windows it’s Edit > Preferences > General.
After Effects > Settings > General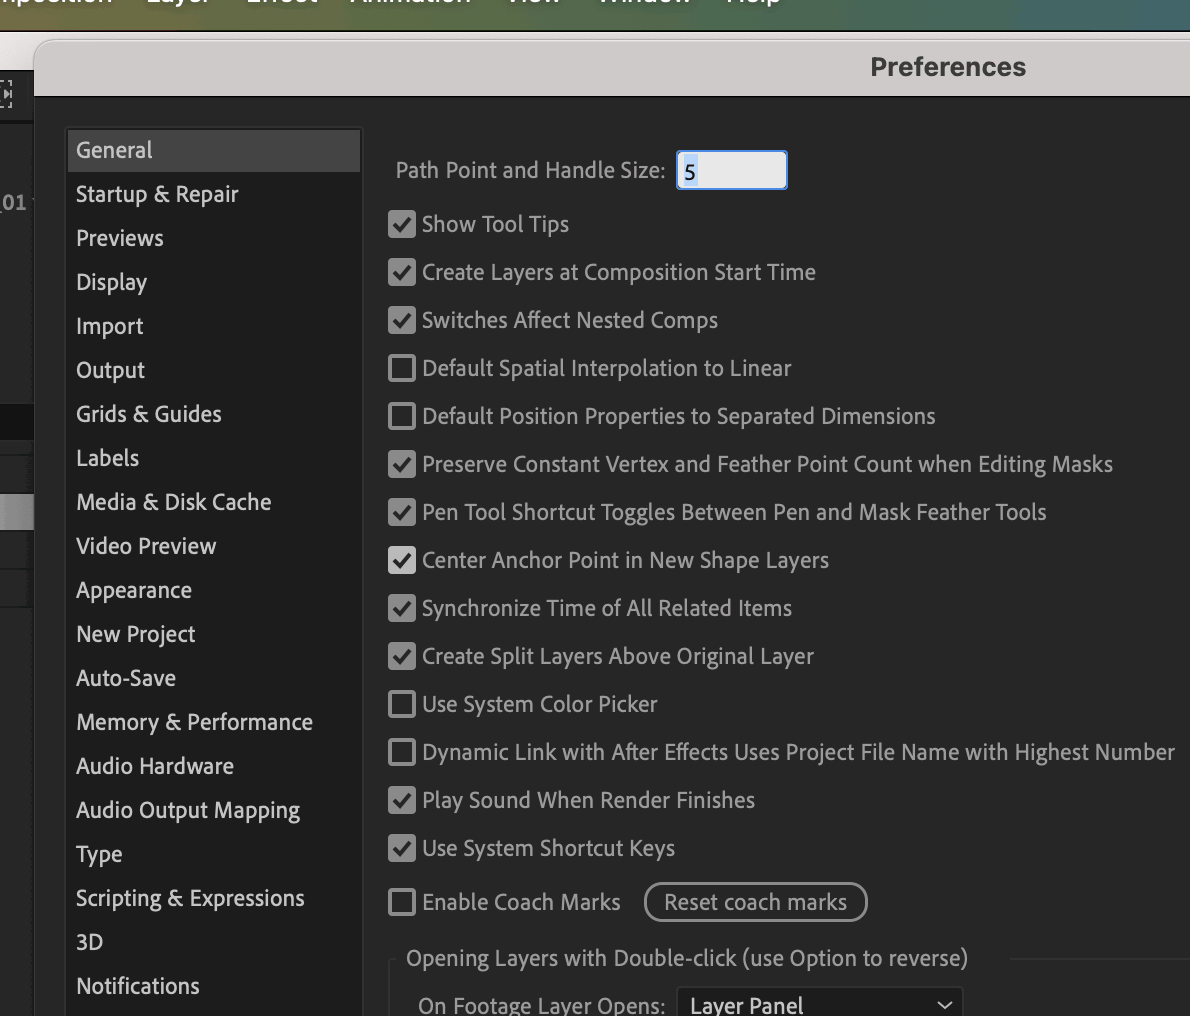
-
02
Pick a shape tool
Select the Ellipse tool in the Toolbar. Press Q to cycle through the shapes.
Q -
03
Draw
Drag in the Composition panel. Hold Shift for a perfect circle, hold Space to move it while drawing.
-
04
One shape per layer
Deselect everything before you draw the next shape. Otherwise it lands inside the selected layer.
F2
A shape layer can hold several shapes in its Contents. They share one Transform, so they always move together. That’s a workflow for later: for now, one shape per layer.
- Shape Layer 2
- Contents
- Rectangle 1
- Transform
- Contents
- Shape Layer 1
- Contents
- Ellipse 1
- Transform
- Contents
- Shape Layer 1
- Contents
- Rectangle 1
- Ellipse 1
- Transform
- Contents
Properties
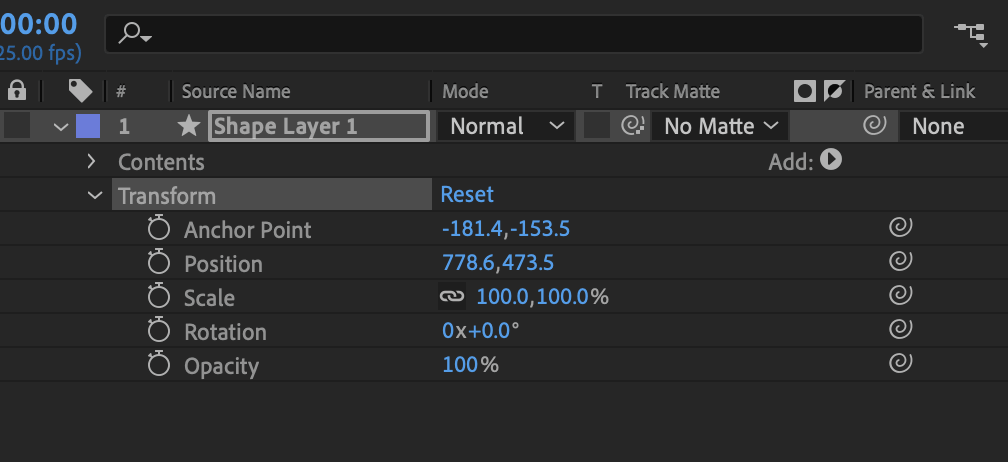
Open the layer with the arrow: you find Contents and Transform. Transform holds the properties you animate: Anchor Point, Position, Scale, Rotation and Opacity.
-
01
Change the values
Drag the blue values, or move the shape with the Selection tool. Watch the values change.
-
02
Reset
Click Reset next to Transform to go back to the start values.
Parenting
Parenting links layers: the child follows everything the parent does.
-
01
Show the column
If Parent & Link is hidden, Ctrl-click a column header.
Columns > Parent & Link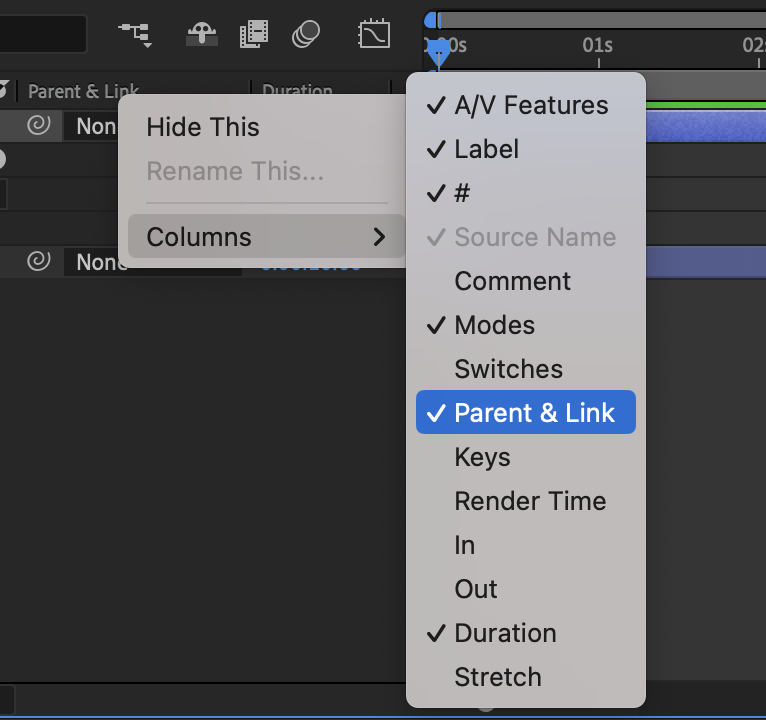
-
02
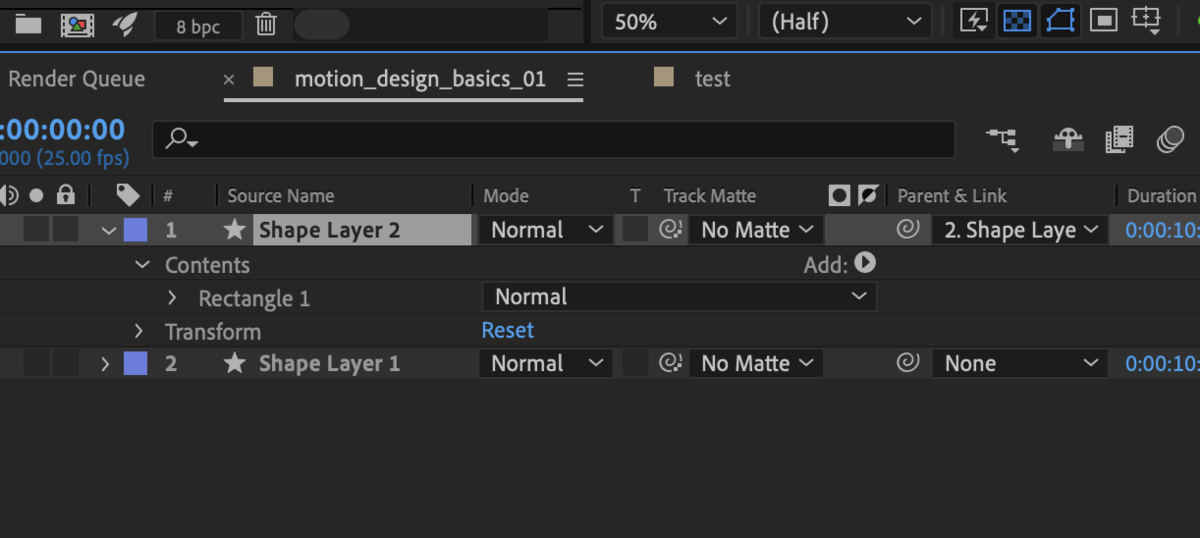
Pick the parent
In the child’s Parent & Link menu, choose the parent layer. Or drag the pick whip onto it.
-
03
Control with a null
A null is an invisible layer that only exists to be a parent. Parent your shapes to it and animate the null.
Layer > New > Null Object
Precompose
Precompose bundles layers into their own comp, a precomp. Use it to reuse an element or to keep the Timeline clean.
-
01
Precompose layers
Select the layers and choose Move all attributes into the new composition.
Layer > Pre-compose -
02
File it
The precomp shows up in the Project panel. Move it into comps > precomps.
A square that follows a circle
Shortcuts
| Action | Mac |
|---|---|
| Cycle shape tools | Q |
| Deselect all | F2 |
| Center Anchor Point in Layer Content | ⌥⌘Home |
| Position / Scale / Rotation | P / S / R |
| Opacity / Anchor Point | T / A |
| Rename layer or comp | Return |
| Pre-compose | ⌘⇧C |
More info
- Creating shapes – Adobe After Effects Help
- Layer properties – Adobe After Effects Help