09 · Render
Render + Formats
To play your animation outside After Effects, you render it. Right settings, no surprises. And watch it before you send it, trust.
This section enables you to
- Render a movie from the Render Queue
- Pick the right format for the job
- Check your output
Render Queue
Select one or more comps and add them to the Render Queue. Three things matter: Render Settings, Output Module and Output To. Then hit Render.

-
01
Trim first
Set the work area with B and N. Ctrl-click it and trim the comp, so you know the exact length later.
Trim Comp to Work Area -
02
Add to the queue
Select the comp and add it to the Render Queue.
Composition > Add to Render Queue -
03
Render Settings
Leave Best Settings. Set Time Span to Work Area Only.
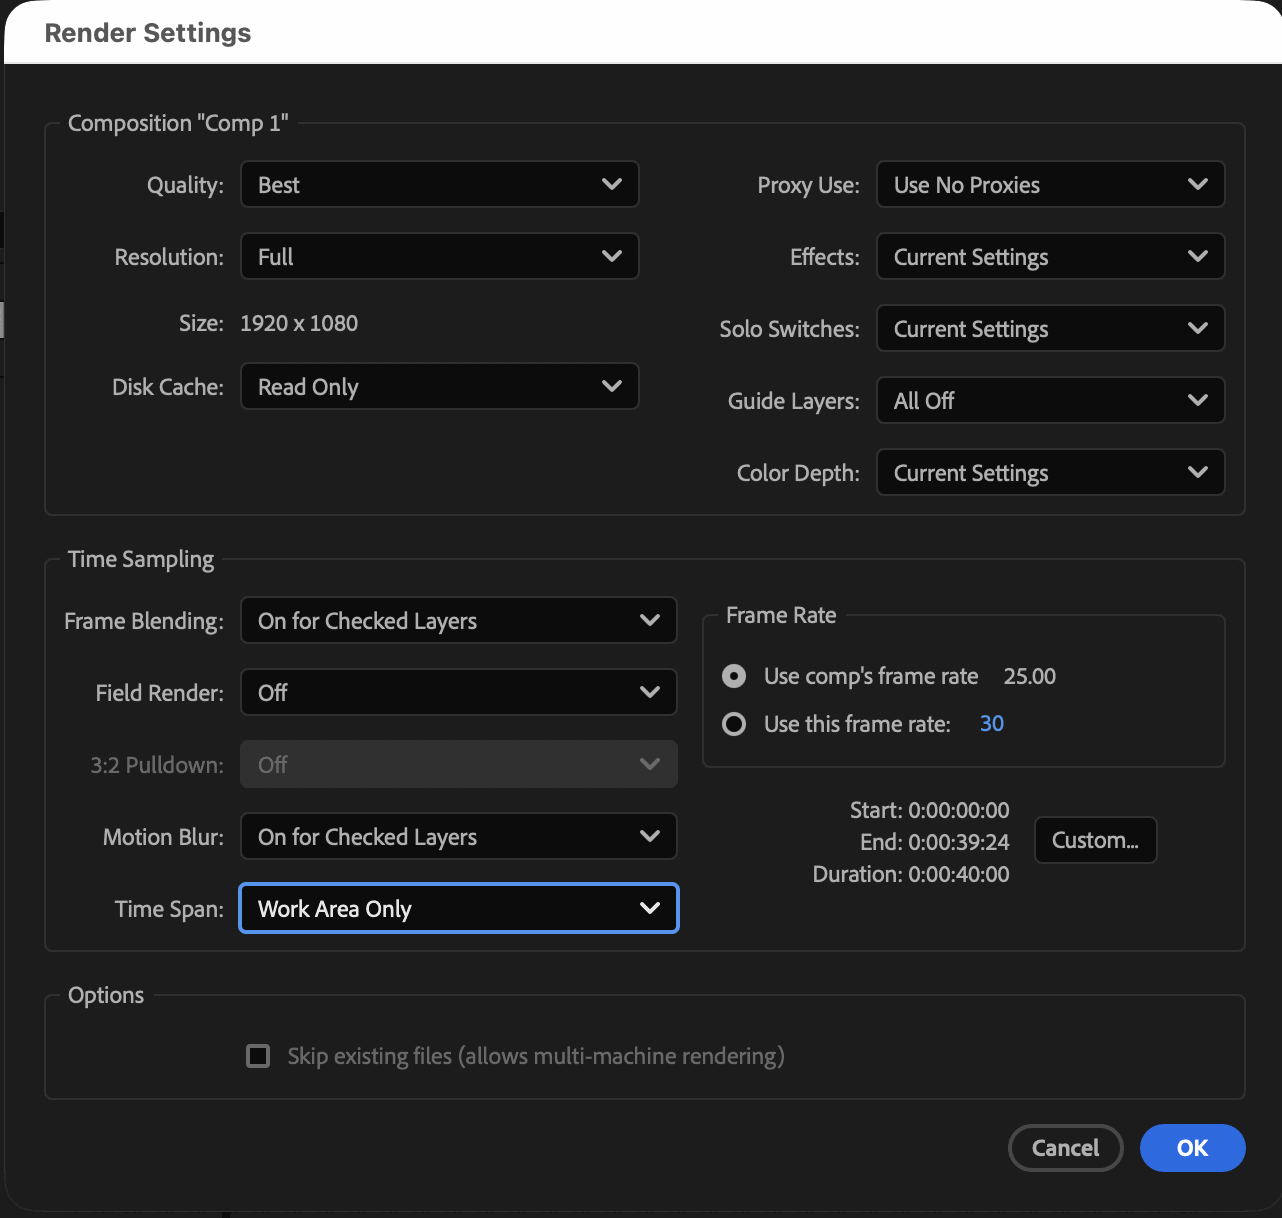
-
04
Output Module
Choose the format for where your movie goes next. See the table below.
-
05
Output To
Save into your output folder.
-
06
Render and check
Click Render. Then watch the whole movie and check that everything is right.
Formats
Pick the format by where the movie goes next.
| Use | Format |
|---|---|
| Web, mobile, desktop | H.264 · 15 Mbit/s |
| Editing program | .mov · Apple ProRes 422 · RGB |
| Editing with transparency | .mov · Apple ProRes 4444 · RGB + Alpha |
| Single frames for editing | TIFF sequence · RGB + Alpha |
Exercise
Render for the web and for editing
Expected result
Your output folder
- output
- motion_design_basics_01_parenting.mp4
- motion_design_basics_01_parenting.mov
Shortcuts
| Action | Mac |
|---|---|
| Add to Render Queue | ⌃⌘M |
| Work area start / end | B / N |
More info
- Basics of rendering and exporting – Adobe After Effects Help
- Exporting H.264 from the Render Queue – Adobe After Effects Help
- Rendern / Komprimieren – dasnorm.ch, also how to make files smaller with HandBrake